Wednesday 28 December 2011

Hardware and Configuration

So in my first post I said I wouldn't go into how to connect and configure your hardware device in order to allow you to start recording your guitar/bass on your computer...well I've changed my mind so here goes nothing.

First of all, I purchased a Line 6 product called Toneport UX1. It's a very simple interface, which allows you to connect a guitar/bass and a microphone.


The set up is simple.

Guitar to Toneport
Toneport to PC (via USB)

It really is as easy as that. But don't get frustrated when we get into the next part.

Configuring your DAW (digital audio workstation) to allow your device to work within the software.

I seem to recall having a hard time getting things to work properly right out of the box so here's how it should work best for you.

Install your devices drivers on your computer and restart your machine.

To see instructions for DAW's other than Reaper please refer to this user manual:

http://l6c.scdn.line6.net/data/l/0a060072153e747a739e447303/application/pdf/GearBox%203.5%20and%20later%20Recording%20Setup%20Guide%20%28Rev%20A%29%20-%20English.pdf

Once you've restarted your machine, fire up Reaper. In Reaper, click on Options from the menu at the top, and select Preferences. From here you'll see a big navigation tree on the left hand column and a bunch of information on the right. To make sure your device is working properly, you want to go to the Audio section on the left hand side, and select Device.

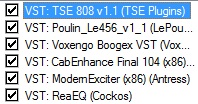
In that menu, you have a drop down for the type of Audio Device you want to select/configure. Click on the drop down menu and select ASIO. From here you'll want to look right underneath that menu and see the ASIO Driver menu. Click on it, and select the option that has your devices name in it. My set up looks like this:


Use the same options as I have in my configuration and you should be running smoothly. For issues with delayed sound, or compatibility issues, please email me or leave a comment and I'll contact you to help.

Thanks for reading,

JFoBTQ

Thursday 15 December 2011

Step 4 - Drums

Installing drumming software is about as basic as installing any other software on your PC.

Whether you chose to use Superior Drummer, Addictive Drums, or BFD2, the set up process should be relatively similar. I happen to use Superior Drummer 2.3, so that's what I'll focus on.

S2.0 Features: http://www.toontrack.com/products.asp?item=30

An easy to follow installation guide can be found here: http://www.timespace.com/content_handler.php?name=sdfaq

Once you have Superior Drummer 2.0 installed. You'll want to make sure you've configured it to work within Reaper, or whichever DAW you decided to use.

First of all, make sure your VST is in the right folder so that your DAW can recognize it. Now load up your DAW and insert a new track. Click on FX, which should show up as a small green icon in the track. When the window pops up, click Add, VSTI, then look for Superior Drummer 2.x. Once you have it loaded, it should look something like this:


Pretty sweet looking, I know....

Try playing around with the different kits available in the version you downloaded. Remember that you can purchase additional kits that have the same sound style your looking for. My recordings on Youtube have several kits from a basic rock kit, Drum Kit From Hell, Metalheads, to Superior 2.0 avatar with a nice set up I downloaded for free online.

If you've made it this far, you're about to see how painful making a drum track can really be. Don't worry though, because the end result is always worth the headache.

Select the track with your drum software, now hit insert in the menu at the top of the DAW, and select Midi Item. Each piece of the drum kit is recorded as a midi file, so you'll want to start plugging in your hits in the midi sequencer. Example:


Usually line C2 is the bass drum, start exploring above and below that line to hear what each line is going to trigger. From that, you should be able to get a sense of where to insert a hit/trigger in order to make it sound like a real drummer is plugging away on a real drum kit.

Check out some tracks on my channel and listen to the drums and how I've programmed them. It might give you an idea of how to create a basic drum track on one of your riffs.

http://www.youtube.com/user/JFoBTQ

Please subscribe, comment, and ask any questions if I've missed anything.

Thanks for reading,


JFoBTQ


Saturday 10 December 2011

Step 3 - EQ

The goal in equalising your freshly recorded track is to highlight the good, and take out the bad. A little bass, some scooped mids, and some nice highs can give you a great heavy/rock tone.

You don't want your guitar tracks to mix into the bass tracks, and either of those to take away from the drum track. When mixing EQ at a very basic level, you need to learn about adjusting the level of Hz. Here's what I know...

The scratchy/hiss noises are usually around 5K, 8K, and 10K. Adjusting the levels down here should take away the hissing noise, but it can affect your tone as well. Here's a screen shot to give you a better idea of what I'm referring to.


In this example I've trimmed off a lot of the low end as to allow bass, and drums to come out in the mix. If you have a guitar track with that boomy heavy sound, you'll kill all your other tracks instantly. Which isn't good.

A small dip at 5K allows for some reduced hissing, and trimming off the high end sounds at about 8K and up gives my sound a better tone and cleaner distortion.

I want to mention that the screen shot above is a plug-in that's built directly into Reaper. And it's quick and easy to use.

As usual, if you have any questions about this section, just email me or leave a comment.

Thanks for reading,

JFoBTQ

Wednesday 7 December 2011

Step 2 Plug-ins

So I know there might be questions about setting up and how to configure your DAW (Digital Audio Workstation), and if that's the case email me with your questions and I'll do my best to answer.

The next piece is about using effects properly and adjusting the tone. I personally use impulses and simulators. Here's a screen shot of the names of the effects I use, which you can google search and download for free.


If you want to use the same plug-ins as me save them all in a folder after you download them.

Eg, C://vstplugins

Load them into Reaper in the same order I have mine. Now since every guitar is different and everyone's sound will be different the only suggestion I can make here is to keep tweaking the sound until you find something you like. I have a preference for very heavy sounding distortion, in case that makes a difference.

If you go the other way and use plug-ins that are ready right out of the box, Amplitube and/or Guitar Rig are my choices. There's such a huge variety of tones, and effects that you can never get bored playing with either of these apps.

 Below is a screenshot of reaper with all the effects I use and how I dial them in. It's not my exact tone that I use in my recent tracks, but if you try to get something similar out of these, you'll start to understand how these work.


I hope you find some use out of all of this, and again if there's questions just email me and ask. My email should be in my profile page.

Next up, EQ. You'll notice that you'll have too much low end or high end in your sound, so I'll go through how to use built in EQ's or downloadable plug-ins.

Thanks for reading,

JFoBTQ


Step 1 for RecordingNewb


I've been playing music for roughly 17 years. Although home production and recording is relatively new to me, I wanted to create a page with useful tips and tricks on how I get my sound.

First things first, you're going to need a good Digital Audio Workstation to get started. I personally recommend Cockos Reaper. http://www.reaper.fm/

Once you've installed Reaper, you're going to want to configure it to allow you to hear your guitar and record properly. You may have to look online for instructions on how to do so, as I can't go through that since there's so many different pieces of hardware you might be using.

Now that you have your devices and DAW configured, you might want to start looking at various effects for your sound. I personally use several which are the following: Amplitube Guitar Rig Amp Simulators and Impulses (Free)  Some of the effects I also use are built right into Reaper. Load up a track in Reaper and arm it for recording by clicking the little red button on the left hand side of the track.

Once you hear your clean guitar playing back through your headphones or speakers, then you're good as gold. Now you can start loading some effects and playing around with them to change the sound of your guitar completely. Try recording a segment of you playing and see how it sounds playing back, now change the effects you're using and see the difference.

If you've made it this far, now you can really start recording multiple tracks and overlaying sounds to create your own unique tone.